
The journal
Single crochet two together with the invisible decrease
In US terminology, an invisible single-crochet decrease works through the front loops of two stitches to make one. Compare it with a regular decrease and count the resulting round.
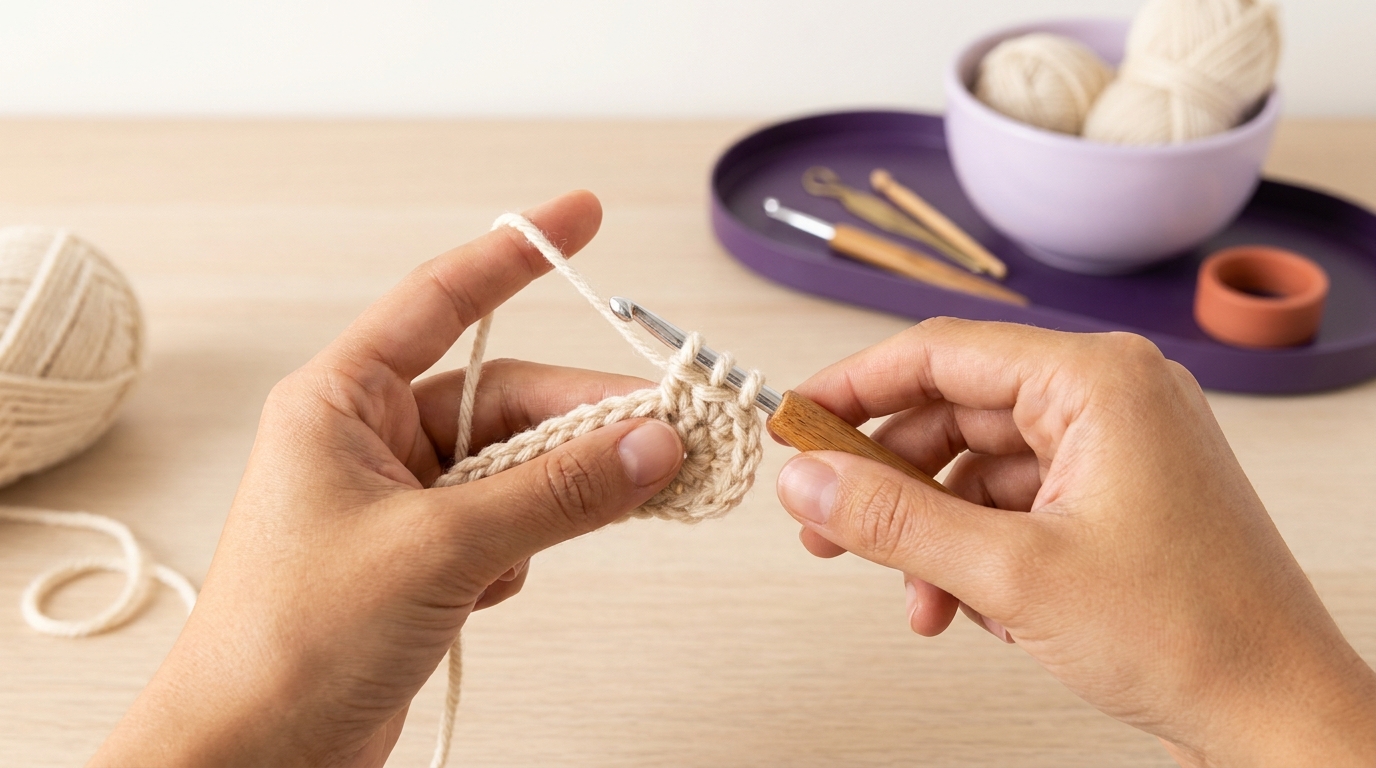
For an invisible single-crochet decrease, insert the hook through the front loop of each of the next two stitches. Yarn over and draw through those two front loops, then yarn over and draw through the two loops remaining on the hook. Two stitches become one, reducing the count by one.
Check the stitch and terminology first
This guide uses US crochet terms. Check your pattern’s abbreviation key before substituting a technique, especially when a pattern uses UK terminology. A regular single-crochet decrease and an invisible decrease have the same count change, but their construction and reverse-side appearance differ.
The Woobles’ photographed decrease tutorial demonstrates both versions and recommends the invisible version for work in the round. Where both sides will show, its guide recommends the regular decrease. Keep that fabric context in mind rather than automatically replacing every decrease in every project.
Work the invisible decrease
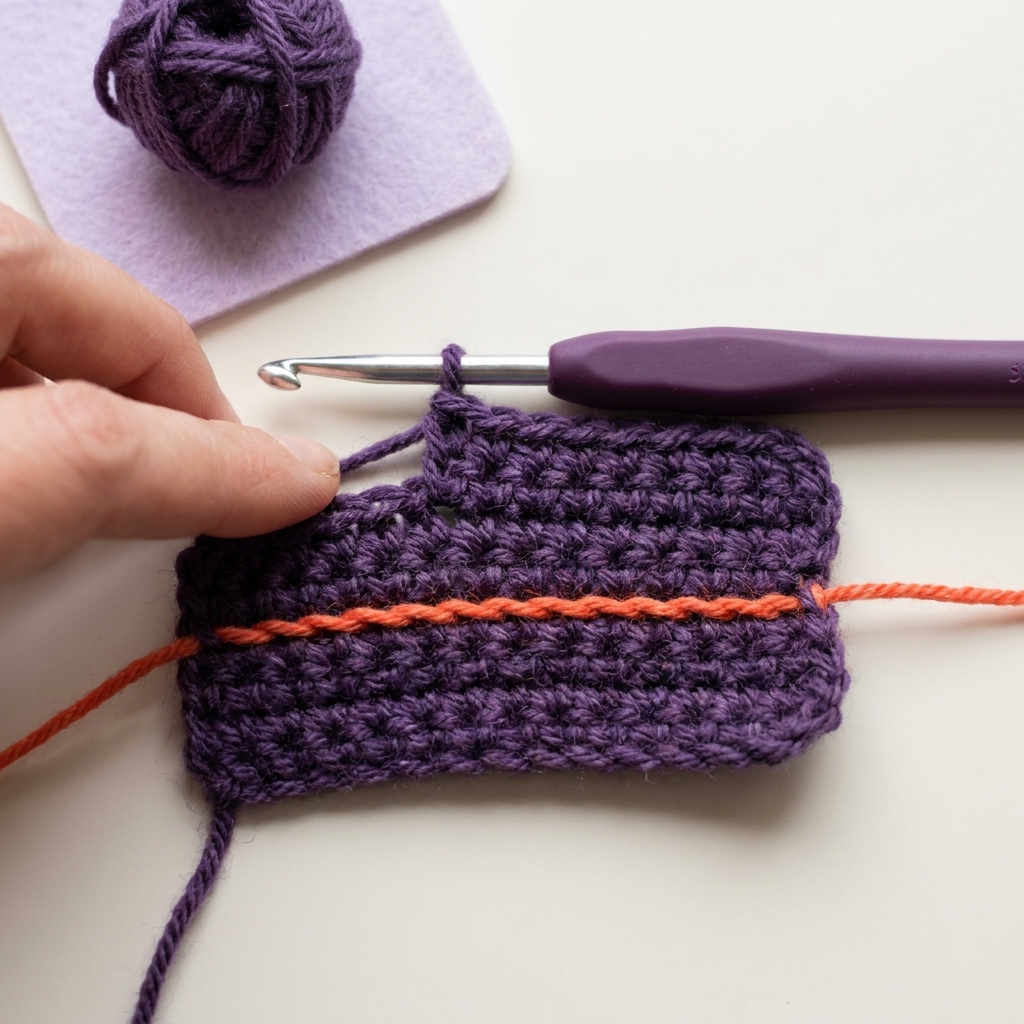
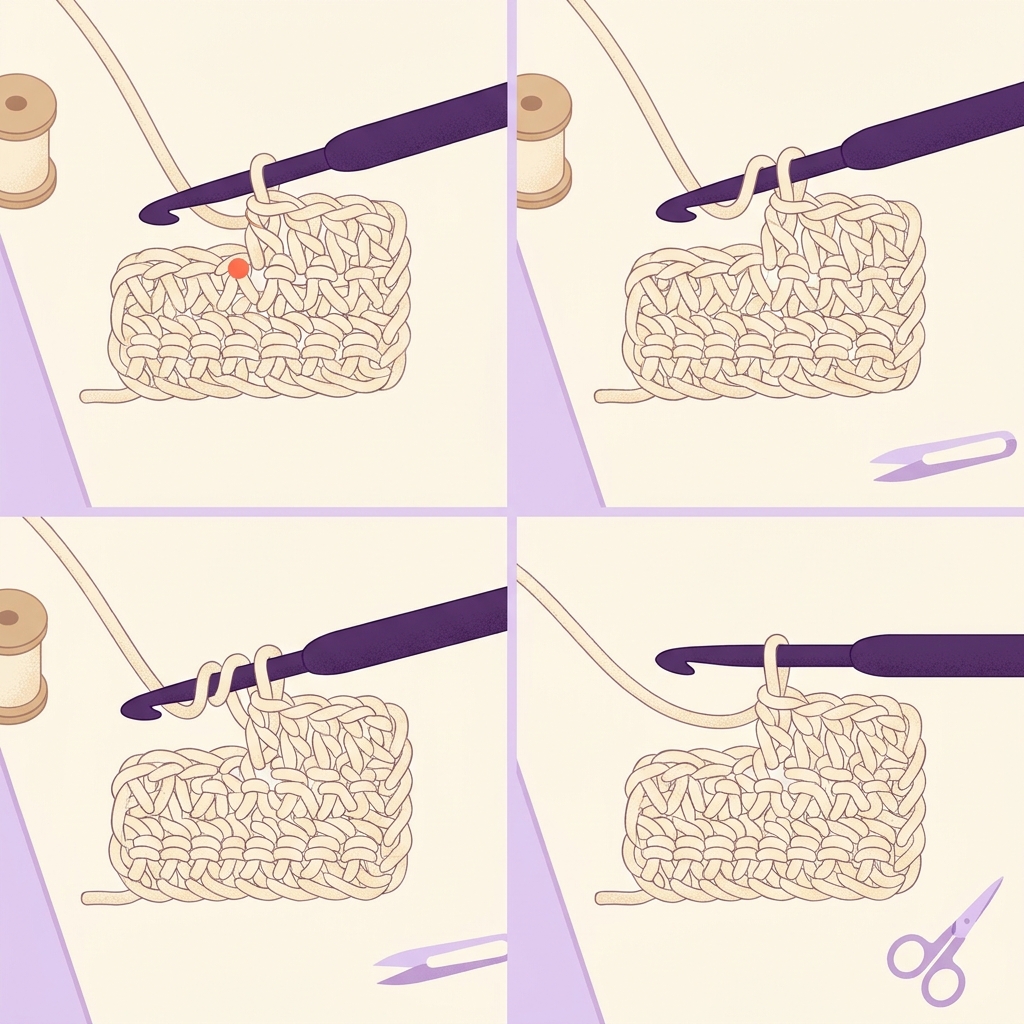
- Locate the next two stitches. Identify each stitch’s front loop, the nearer strand of its top V in the normal working orientation.
- Insert the hook under the first front loop, then under the next front loop. Keep the working loop on the hook and do not yarn over between those insertions.
- Yarn over and pull through the two collected front loops. Two loops remain on the hook.
- Yarn over again and pull through both remaining loops. One working loop remains.
Check the two stitches you consumed before moving to the next one. Do not accidentally work into either of them again. If the stitch feels unusually tight, look for split yarn or a loop entered incorrectly rather than forcing the hook through.
Check the count in your pattern
One decrease uses two old stitches and produces one new stitch. For example, if a round starts with 12 stitches and contains two decreases plus eight ordinary single crochets, it ends with 10 stitches: the decreases consume four old stitches and produce two new ones. This is arithmetic, not a replacement instruction for your pattern.
Practise before the shaped section
Try the movement on spare fabric if the front loops are difficult to identify. Compare the normal decrease with the invisible version from both sides. Choose the version the pattern specifies where the structure or visible reverse matters.
A marker helps preserve your place while checking. See how stitch markers help in crochet. Keep a note of the completed round before putting the project away; an accurate count is more useful than pulling the yarn tighter to hide a gap.
Put this into practice
Count the stitches before and after a small sample decrease. Check which loops the method uses and compare the resulting fabric, rather than assuming an extra loop on the hook is part of the intended reduction.
Check an invisible decrease
If the pattern asks for another decrease method, follow its instructions or ask the designer whether a substitution is appropriate. A smoother-looking right side does not make the invisible version the right construction for every item.

Optional equipment for this guide
A hook set is optional if you do not own the size specified for the yarn and project. The invisible decrease is a stitch technique; a new hook does not ensure the result.
As an Amazon Associate I earn from qualifying purchases. These are researched options, not hands-on test results. Check the exact size or model, current price and availability on Amazon.
| Product option | Fit and limits to check | Retailer |
|---|---|---|
| Product imageClover Amour 3672 crochet hook set | A set of ten hook sizes for different yarn projects. Match the hook to the pattern and your gauge rather than the yarn label alone. | View on Amazon |